
So I’m not a professional or anything like that. I am a normal girl who knows how to work a sewing machine and wants to make her own clothes. I don’t know how to make patterns (yet)(well, I’ve never tried) and I don’t know all the fundamentals of sewing. I see something that I like, I inspect the piece, I go buy some fabric and I attempt to make it. I make mistakes and I am sure there are probably much easier ways to make things but eh, I do it my way. So by doing it my way, I am going to show you how I made this two piece skirt and top!
Materials needed:
- 2 yards of fabric
- Zipper
- Tape measure
- Fabric scissors
- Thread
- Pins
Steps:
-
- Measure your waist. This is the smaller part of your stomach, above your hips. Or measure where you want the skirt to sit.
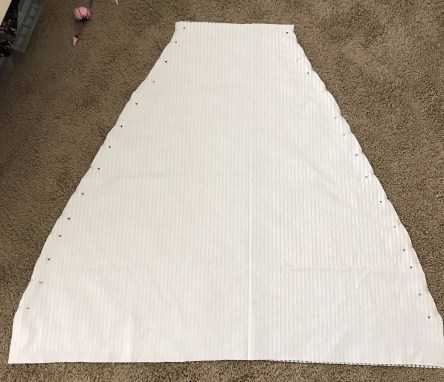
- Fold the fabric in half, with the print side touching. With the folded side facing up, make a guess of where the center is and lay your tape measure along it. Measure from 1 inch to half of what your waist size is. (example: waist size: 27 so use 13.5 inches. I also gave myself some slack to work with so I would do that and you can always fold it over when you are putting the zipper on). Make a mark on where that is then fold it in half again but to the side, not up and down. The point of this is to create a front and back of the skirt. Once you have folded it. Cut the shape of the skirt so when you unfold it, it looks like a skirt. Here are some pics to help it make sense.

- After I created my shape, I cut the waist part so there was an opening. Then I pined the two sides and did a straight stitch to create the skirt. Remember to do this with BOTH print sides touching each other so when you flip it inside, the stitches are the inside!
- I then placed the skirt fabric and the, what will be the band fabric, facing each other and sewed to create a band!
- Once I did that, I lined the zipper up to the back of the skirt to see how long it was and I cut a straight line down the back of the skirt. With the skirt being inside out, I folded the raw edges and sewed the zipper on.
- From there, I was able to put the skirt on and I measured how long I wanted it to be. Then I took it off, cut it and sewed the raw edges and the skirt was finished!
My friend, Maggie asked me what the shirt was going to look like, and I didn’t even think about making a top! So I gathered some left over pieces and created this top. How I made this top is very similar to how I made my gingham top – which I will make a blog post on next. The only difference is that I added straps to this one. To make the straps, I cut two pieces of fabric then folded them in half – print sides touching then sewed close to the edge so I had room to flip the fabric inside out. I measure the length of the strap then sewed them on normally!
Again, I am not a professional. I am just learning and having fun with it so thanks for reading 🙂

Leave a comment